

Our draft solo route uses the Longfin, Main Dock infiltration, Drainage Tunnel compound entry, main gate exit, and a southwest swim escape. Fill the bag before the compound where possible. For solo-accessible loot, prioritise cocaine, then weed, conditional office paintings, then cash. The author must verify this route on the current build.
The route is a recommendation, not a game rule. Loot location, guard behaviour, mistakes, and scoped entry points can change the best decision.

Cayo Perico solo route at a glance
Choice | Recommendation | Alternative |
|---|---|---|
Approach vehicle | Longfin | Kosatka for a shorter compound-first route |
Island infiltration | Main Dock | Airstrip if the scoped loot is better |
Compound entry | Drainage Tunnel | Another scoped entry for a different route |
Weapon loadout | Conspirator with suppressors | Use the loadout the author can verify cleanly |
Secondary loot | Cocaine, weed, office paintings, cash | Take a lower-value stack if it preserves Elite time |
Compound exit | Main gate | Required route test may identify another stable exit |
Island escape | Motorcycle to southwest cliff, then swim | Use a scoped boat if it is safer in the tested run |
Record your target and loot in the Cayo heist planner before starting preps.
Cayo Perico solo prerequisites
Required
- Kosatka submarine: GTA$2,200,000 base price
- First-time introduction: Meet Miguel Madrazo through the introductory sequence that unlocks the Kosatka and heist
- Setup fee: GTA$100,000 for repeat runs. The first Madrazo Files run has no setup fee.
- Scoped island access: Main Dock or the chosen infiltration point
- Scoped compound access: Drainage Tunnel for this route
- Required preps: Approach vehicle, weapon loadout, Fingerprint Cloner, Cutting Torch, and either Plasma Cutter or Safe Codes according to the primary target
Recommended but optional
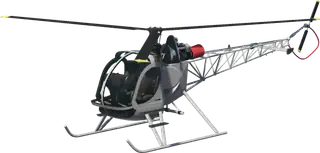 Sparrow: GTA$1,815,000 in the current vehicle data before weapon additions. It shortens travel between Kosatka preps.
- Suppressors: Select them for the finale loadout used by this stealth route.
- A saved route note: Mark the best cocaine, weed, and cash locations found during Gather Intel.
Platform: Cayo Perico is available across current GTA Online editions. Menu labels and input prompts must be checked on the named test platform before publication.
Gather Intel
- Start Gather Intel from the Kosatka planning screen. Pay the setup fee on repeat runs.
- Reach Cayo Perico and access the communications tower. Complete the signal-box interaction to view the compound cameras.
- Identify the primary target. The tool will use it for the payout estimate.
- Scope the Drainage Tunnel if it is not already available. Swim behind the compound until the point registers.
- Scope the Main Dock. Record the secondary loot in lockups you can reach alone.
- Check the Airstrip if Main Dock loot is weak. A longer route can still be better if it replaces cash with cocaine.
- Record paintings visible in the office camera. Office paintings are conditional and consume half a bag each.
- Choose the route before leaving intel. Do not fill the bag with the first cash you see if scoped cocaine is only a short detour away.
Gold inside locked compound rooms is not part of the normal solo plan. Those doors require two players to use the keycards together.
Which Cayo prep missions to complete
For the Longfin and Drainage Tunnel route, complete:
- Longfin approach vehicle prep
- Fingerprint Cloner
- Cutting Torch
- Plasma Cutter for a glass-case primary target, or Safe Codes when the planning screen assigns them
- Conspirator weapon loadout, then add suppressors
The demolition-charge prep is not needed when the Drainage Tunnel and Cutting Torch are used. Disruption preps can be skipped for a clean stealth route, but that advice assumes the author has verified the current guard pattern. A beginner who expects detection may prefer the insurance of completing them.
Check the planning screen after every prep. Do not rely on an old video for which equipment the current primary target requires.

Best Cayo Perico secondary loot for solo players
The important comparison is value per bag space, not only value per stack.
Loot | Value per stack | Bag space | Approx. full-bag value | Solo access | Source state |
|---|---|---|---|---|---|
Gold | GTA$295,500 to GTA$300,000 | 66.7% | GTA$443,000 to GTA$450,000 | No, locked compound rooms require 2+ | Cross-checked values |
Cocaine | GTA$178,200 to GTA$182,250 | 50% | GTA$356,400 to GTA$364,500 | Yes | Cross-checked values |
Weed | GTA$117,450 to GTA$121,500 | 37.5% | GTA$313,200 to GTA$324,000 | Yes | Bag fraction is community-reported |
Painting | GTA$141,750 to GTA$162,000 | 50% | GTA$283,500 to GTA$324,000 | Only when in a solo-accessible location such as the office | Cross-checked value range |
Cash | GTA$70,875 to GTA$74,925 | 25% | GTA$283,500 to GTA$299,700 | Yes | Cross-checked values |
For a solo run, the normal value order is cocaine, weed, painting, cash. Route time can override a small value difference. An office painting that finishes the bag without another island detour may be better for the Elite Challenge than higher theoretical loot elsewhere.
Gold has the highest full-bag value but is excluded from the standard solo recommendation. Do not use a glitch or an obsolete door method to present it as normal solo access.
Solo finale walkthrough
- Select the Longfin and Main Dock infiltration. Set the Drainage Tunnel as the compound entry and keep the selected escape point consistent for the run log.
- Drive to the scoped Main Dock lockup. Use only the takedowns required to open the route. Record any guard whose detection cone differs from the draft map.
- Use the Cutting Torch on the lockup. Fill the bag with cocaine first, then weed or cash according to the scoped layout.
- Return to the Longfin. If Main Dock cannot fill the bag efficiently, follow the preselected Airstrip alternative rather than improvising across the island.
- Take the Longfin to the Drainage Tunnel. Enter the compound through the underwater grate.
- Move to the office. Avoid optional guards unless the test log proves the takedown is stable.
- Empty the office safe. Its GTA$18,000 to GTA$99,000 is separate from bag capacity and is exempt from the modelled fence and Pavel fees.
- Use the office elevator or the verified basement route. Complete the fingerprint hack without a failed attempt if pursuing Elite.
- Collect the primary target. Use the Plasma Cutter or Safe Codes assigned by the target prep.
- Leave through the main gate. Recheck the minimap before committing to the exit path.
- Take the verified motorcycle route to the southwest cliff. Do not copy a takedown from an older route until current guards are checked.
- Swim southwest away from the island. Continue until the escape triggers.
If the bag was not filled before the compound, a compound-first Kosatka route followed by Main Dock loot may be more suitable. It adds island movement after the primary target and needs its own guard-pattern test.
Cayo Perico Elite Challenge solo checklist
The current dataset records these conditions:
- Finish in under 15 minutes
- Complete with no failed hacks
- Fill the loot bag
- Do not get wasted
- Do not get detected inside the compound
The bonus is GTA$50,000 on Normal Mode and GTA$100,000 on Hard Mode. A restart or route mistake can cost more time than a slightly lower-value nearby loot stack, which is why the highest theoretical bag is not always the best practical choice.
Current Cayo Perico primary target payouts
Primary target | Normal | Hard | Availability |
|---|---|---|---|
Madrazo Files | GTA$1,100,000 | Not applicable | First story run only |
Sinsimito Tequila | GTA$400,000 | GTA$440,000 | Normal target pool |
Ruby Necklace | GTA$560,000 | GTA$616,000 | Normal target pool |
Bearer Bonds | GTA$616,000 | GTA$677,600 | Normal target pool |
Pink Diamond | GTA$910,000 | GTA$1,001,000 | Normal target pool |
Panther Statue | GTA$1,900,000 | GTA$2,090,000 | Event-only |
Fees and one worked solo payout
The dataset models a 10% fence fee followed by Pavel's 2% cut on the remaining applicable loot. That order gives an effective 11.8% deduction rather than adding the percentages into a flat 12%.
Example on Hard Mode with a Pink Diamond, two average cocaine stacks, and the office safe:
- Pink Diamond: GTA$1,001,000
- Two cocaine stacks at the midpoint: GTA$360,450
- Applicable gross: GTA$1,361,450
- Modelled fees at 11.8%: GTA$160,651
- Applicable take after fees: about GTA$1,200,799
- Add office safe: GTA$18,000 to GTA$99,000
- Subtract setup fee: GTA$100,000
- Add Hard Elite if earned: GTA$100,000
With the setup fee and Hard Elite cancelling each other in that example, the modelled result is about GTA$1,218,799 to GTA$1,299,799. The range changes with actual cocaine and safe values. It excludes temporary weekly multipliers and first-time awards.
Use the heist planner instead of carrying this one example into a different target or loot layout.
Solo cooldown and Hard Mode
Rockstar states that a solo Cayo finale triggers a cooldown of three in-game days. One in-game day is 48 real minutes, so the derived conversion is 144 real minutes.
Group runs use a shorter one-in-game-day cooldown in the GTATracker dataset. Cooldown is wall-clock waiting time and must not be removed from a repeat-rate calculation.
The current dataset says Hard Mode is available when the next heist is started within a 48-real-minute window after it becomes available. That exact trigger wording is community-sourced in the dataset and needs an in-game timing check. Hard Mode adds 10% to the primary target and raises the Elite bonus to GTA$100,000.
Common solo mistakes
- Not scoping the Drainage Tunnel: the planning option cannot be assumed if the entry has never been registered.
- Taking cash before checking cocaine: a full bag prevents replacing lower-value loot later.
- Planning around compound gold: normal locked-room gold requires at least two players.
- Forgetting the office safe: it uses no bag space and is modelled outside the loot fees.
- Failing a fingerprint hack: one failed hack loses the Elite condition in the current dataset.
- Using an old guard route: pathing and detection advice can become stale after updates.
- Treating the Panther Statue as normal: it is an event-only target.
- Calling active-hour earnings a repeat rate: the solo cooldown is 144 real minutes.